Getting Started with Gitpod Self-Hosted
Note: Setting up a self-hosted Gitpod instance needs some Kubernetes experience. Detailed guidance on how to setup and maintain a Kubernetes cluster is behind the scope of these docs. See also Prerequisites to Install Gitpod Self-Hosted.
Step 1: Create a Kubernetes Cluster
Gitpod is a Kubernetes application that uses Kubernetes internally to provision workspaces as Kubernetes pods. Before you can start installing Gitpod, you need to create a compatible Kubernetes cluster. Since the steps needed to create a proper cluster differ between the cloud providers, it’s up to you to setup a cluster that meets the proper requirements. We have created a list of examples and scripts that will help you to get started with your favorite cloud provider.
Step 2: Install Cert-Manager
Once you have created your Kubernetes cluster you need to install cert-manager. cert-manager is needed even when you bring your own TLS certificate for your domain. Please consider the cert-manager documentation on how to install it.
Creating TLS certs for your domain with cert-manager
cert-manager provides the Gitpod installation with certificates for internal communication. Besides this, cert-manager can also create a TLS certificate for your domain. Since Gitpod needs wildcard certificates, you must use the DNS-01 challenge. Please consult the cert-manager documentation for instructions. You can use either an Issuer or ClusterIssuer.
Following the cert-manager instructions, you will have an Issuer or ClusterIssuer with a configured dns01 solver (most probably with a proper secret with credentials for your DNS provider) as well a Certificate with the following dnsNames:
example.com*.example.com*.ws.example.com
(replace example.com with your Gitpod domain)
Step 3: Configure DNS
To install Gitpod you need a domain with a TLS certificate. The DNS setup to your domain needs to be configured such that it points to the ingress of your Kubernetes cluster. You need to configure your actual domain (say example.com) as well as the wildcard subdomains *.example.com and *.ws.example.com.
Step 4: Install Gitpod
At this point, you should have:
- a running Kubernetes cluster
- cert-manager installed in this cluster
- a TLS certificate for your domain (incl. wildcard subdomains) or a configured
Issuer/ClusterIssuerplusCertificatefor cert-manager - a domain with proper DNS setup
To start with installing Gitpod, you need a terminal where you can run kubectl to access your cluster. First, install the KOTS kubectl plugin:

 language:
 curl https://kots.io/install | bashNow, you are ready to install Gitpod. Run the following command in your terminal:
language: kubectl kots install gitpodYou will be asked for the namespace you want to install Gitpod to as well as a password for the admin console. After some time, you will see the following output:
  • Press Ctrl+C to exit
  • Go to http://localhost:8800 to access the Admin Console
Open your favorite browser and go to http://localhost:8800 (port 8800 is opened on your node on localhost only—you may want to forward the port to your workstation in order to access the admin console).
The first page will ask you to upload your Gitpod license which you can get here For more information about our licenses and respective pricing plans, please visit our self-hosted pricing page.
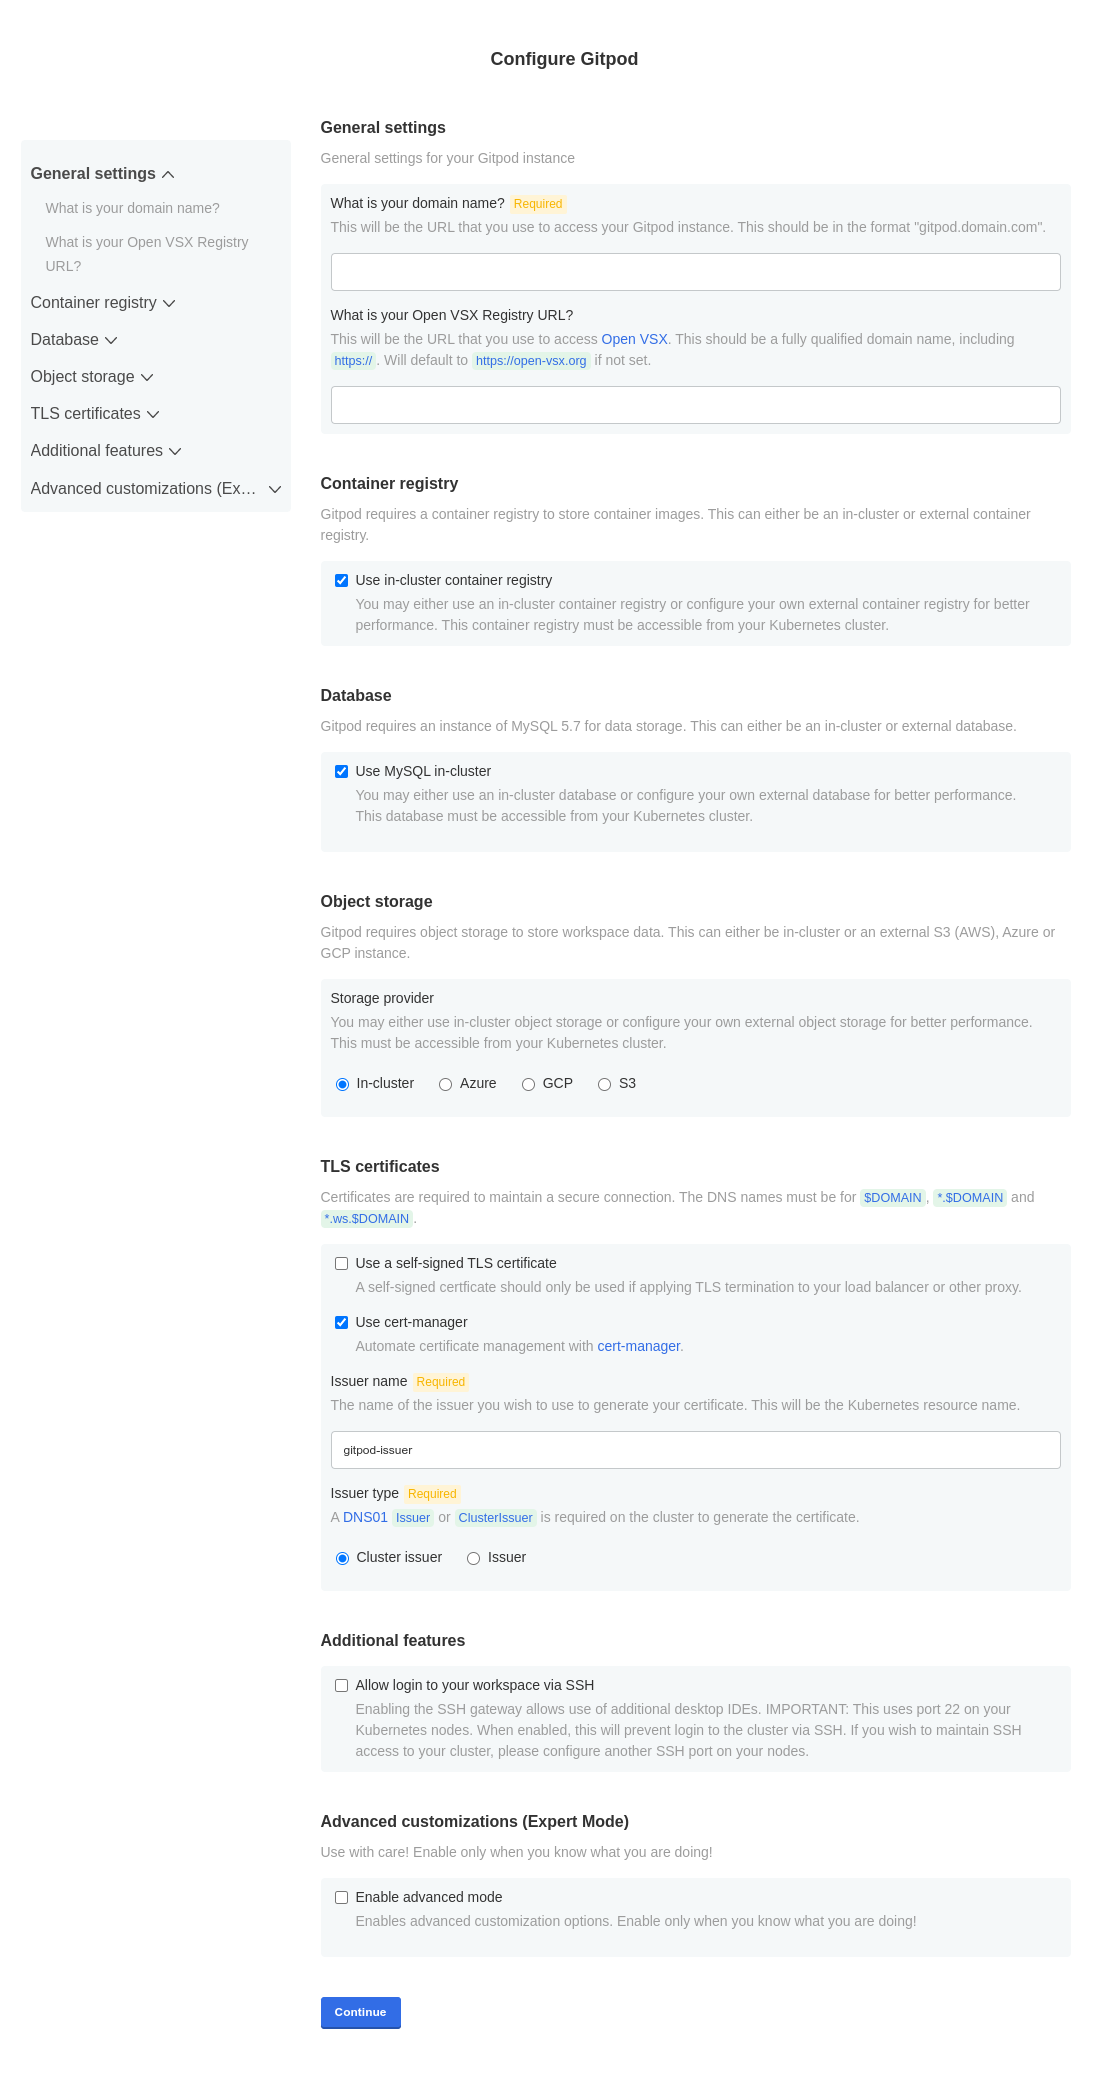
After uploading the license, you will be forwarded to the config page. On this page, you need to enter your domain name for your Gitpod installation. You can also configure to use external components (by default internal ones are installed) as well as your TLS certs setup. Click “Continue” to proceed with the installation.
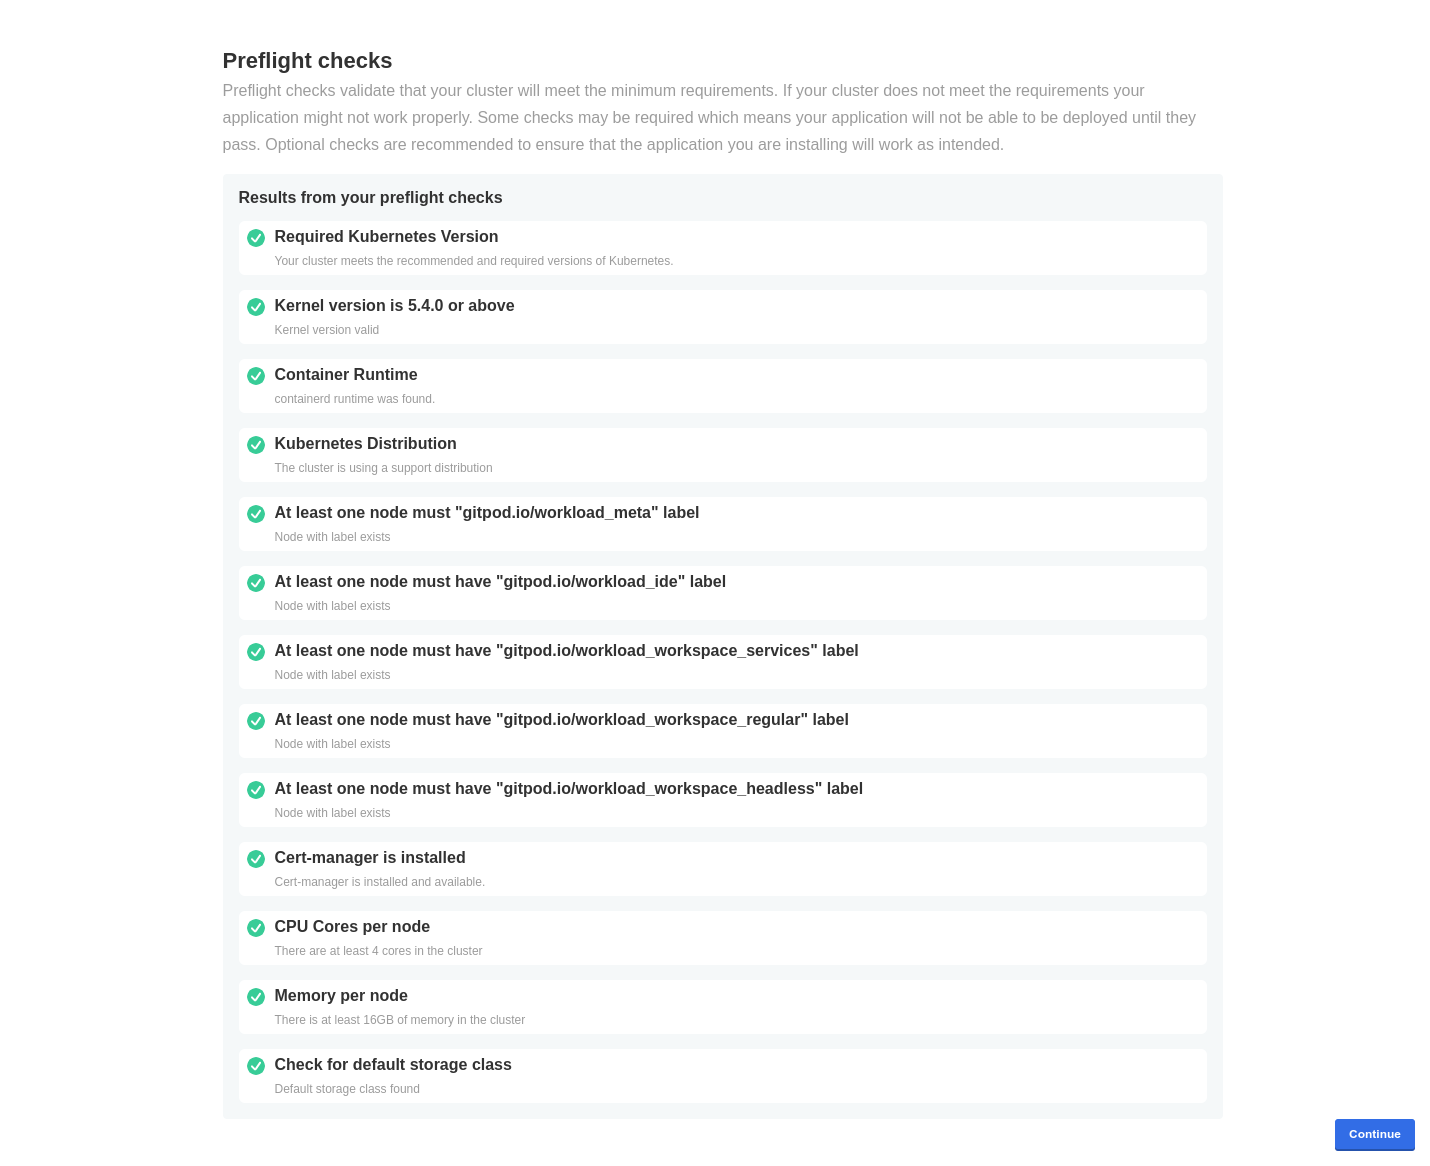
In the next step, the installer runs a preflight check. This validates your cluster meets the minimum requirements. Everything is green? Awesome! Click “Continue” to proceed.
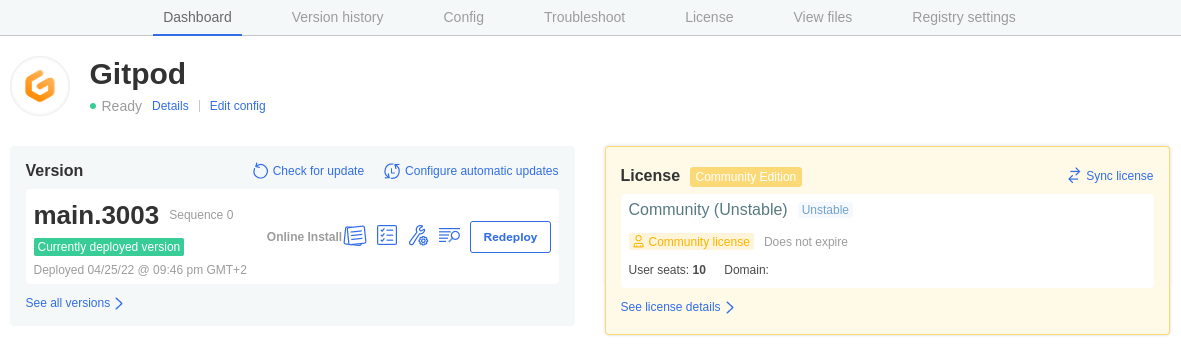
Now, you are seeing the installation admin page. Once the installation has been finished successfully, you will see the status “Ready” with a small green indicator next to the Gitpod logo. You will also see which version you installed and which license you are using.
Open your Gitpod domain in your browser to access your running Gitpod instance. The first screen you see will ask you to configure a git integration. This git integration will also serve as the way that you and your users get authenticated against your Gitpod installation. You can find out more in the Integrations section.
Important: Public (SaaS) Source Control Management Systems (SCMs) (i.e. GitLab.com, GitHub.com and Bitbucket.org) are not integrated by default with a Self-Hosted Gitpod instance because OAuth apps are tied to domains. Therefore, these public SCMs need to be integrated manually with an OAuth application you specifically create for your domain. This is done similarly to how it is done for the private/self-hosted versions of each SCM. As such their respective guides also apply here:
- Follow these steps to integrateGitLab.comwith your self-hosted Gitpod instance. You will need to entergitlab.comas theProvider Host Namein the New Git Integration Modal.
- Follow these steps to integrateGitHub.comwith your self-hosted Gitpod instance. You will need to entergithub.comas theProvider Host Namein the New Git Integration Modal.
- Follow these steps to integrateBitbucket.orgwith your self-hosted Gitpod instance. SelectBitbucketas theProvider Typein the New Git Integration Modal. For bitbucket.org this requires configuring an “OAuth consumer” on a “workspace”. This is slightly different from the documented Bitbucket Server integration. See gitpod PR #9894 for an example.
Note: Your first workspace start can take a bit of time because the workspace image first needs to be built and then downloaded. Subsequent workspace starts should be much quicker.